Satellites
How to Photograph the ISS: Pass Timing, Settings and Trails
Apart from the Moon, the International Space Station is the most predictable bright object in the night sky. It appears on schedule to the second and crosses the sky in a few minutes as a steady point of light, brighter than any star. Often it fades out partway across as it moves into Earth's shadow. To learn how to photograph the ISS, you mostly need to know exactly when and where it will appear. Then you frame the arc in advance and let the camera run. The same method works for Tiangong, Hubble and the Starlink trains.
At a glance
- Settings: f/2.8 with 10–13 s frames, or f/4 with 12–15 s. ISO 400–800 from a town, 800–3200 from a dark site. White balance 3500–4500 K, manual focus, continuous shooting with a one-second gap.
- Which passes: maximum altitude above 20–30°, brightness better than magnitude 0. The best reach −3 to −4, brighter than Venus.
- When: within a couple of hours after sunset or before sunrise. The station has to be sunlit while your sky is dark.
- Afterwards: stack the frames with a Lighten blend so the trail becomes one continuous arc.
What you're seeing
The ISS orbits about 250 miles up at 17,500 mph and circles Earth sixteen times a day. Its orbit is inclined 51.6° to the equator, so it passes over almost everywhere between 52° north and 52° south. It has no lights you can see. It shines by reflected sunlight, so you only get a pass when the station is still in daylight while you're in darkness. That means the couple of hours after dusk and before dawn. When it crosses into Earth's shadow it fades over ten or twenty seconds and disappears, sometimes right overhead. That can be a surprise the first time you see it.
A pass lasts four to six minutes horizon to horizon. Passes come in runs of several nights in a row, often two per night about 90 minutes apart, and then there's a gap of a week or two.
When is the ISS visible: reading a pass prediction
Every prediction gives you the same basics: the time it appears, the direction and altitude it appears at, the maximum altitude and when it gets there, the direction and time it disappears, and the brightness. Read them like this:
- Maximum altitude: below 20° the station is low, dim through thick air and only visible for a short time. A pass of 40° and above is good, and at 70°+ the station goes almost overhead.
- Brightness (magnitude): smaller is brighter. Anything better than 0 is easy to see, −2 is obvious, and −3 to −4 is brighter than everything except the Moon.
- Direction: the ISS always moves west to east (southwest to northeast, northwest to southeast), never the other way. That tells you which way to frame.
- "Fades into Earth's shadow": the station will disappear before it reaches the horizon. Plan the frame for where it fades, not where it would have set.
Still Dark predicts ISS, Tiangong, Hubble and Starlink passes for your location in Sky Events → Satellites, with the appear/peak/disappear times and directions, the maximum altitude, the predicted magnitude, and whether the pass fades into shadow. Tap a pass to see the arc drawn across the 360° sky, and set a reminder. Orbit data is refreshed when you're online and is reliable for about two days either side.
Planning the frame
- Pick the pass: one with a high maximum altitude on a clear night.
- Choose the sky you'll photograph: the whole arc with a wide lens (14–24 mm), or a section of it (the peak, say) with a 35–50 mm lens over a landmark.
- Preview the arc in the 360° sky with the time set to the pass, and note where it enters and leaves your frame.
- Set up 10–15 minutes early. Compose, focus and take test frames of the sky so the exposure is right before the station appears.
- Start shooting 30 seconds before the predicted appearance. Predictions are accurate to seconds, so the station will be on time and you need to be ready before it.

What gear you need
- Any camera with manual exposure and a wide or normal lens.
- A tripod and an intervalometer (or the built-in interval timer).
- A lens fast enough: f/2.8 is ideal, f/4 works.
- Optional: a second body with a telephoto if you want to try for a transit (below).
How to photograph the ISS: camera settings
- Manual, RAW, long-exposure noise reduction off.
- Aperture f/2.8–f/4.
- Shutter 10–15 s per frame: f/2.8 with 10–13 s, or f/4 with 12–15 s. A single 30-second frame at ISO 400 works for a short section. The trail's brightness on the sensor doesn't depend on the shutter. Only the length of each segment does, so shorter frames give you smaller gaps and more control.
- ISO 400–800 under a town sky, 800–3200 under a dark one. Keep the sky background off the right edge of the histogram. The ISS is bright and will record either way.
- White balance 3500–4500 K, fixed.
- Manual focus on a bright star at 100%. Our guide to focusing at night has the routine if you have trouble with this step.
- Continuous shooting with a one-second gap. The gaps become small breaks in the stacked trail, so keep them short.
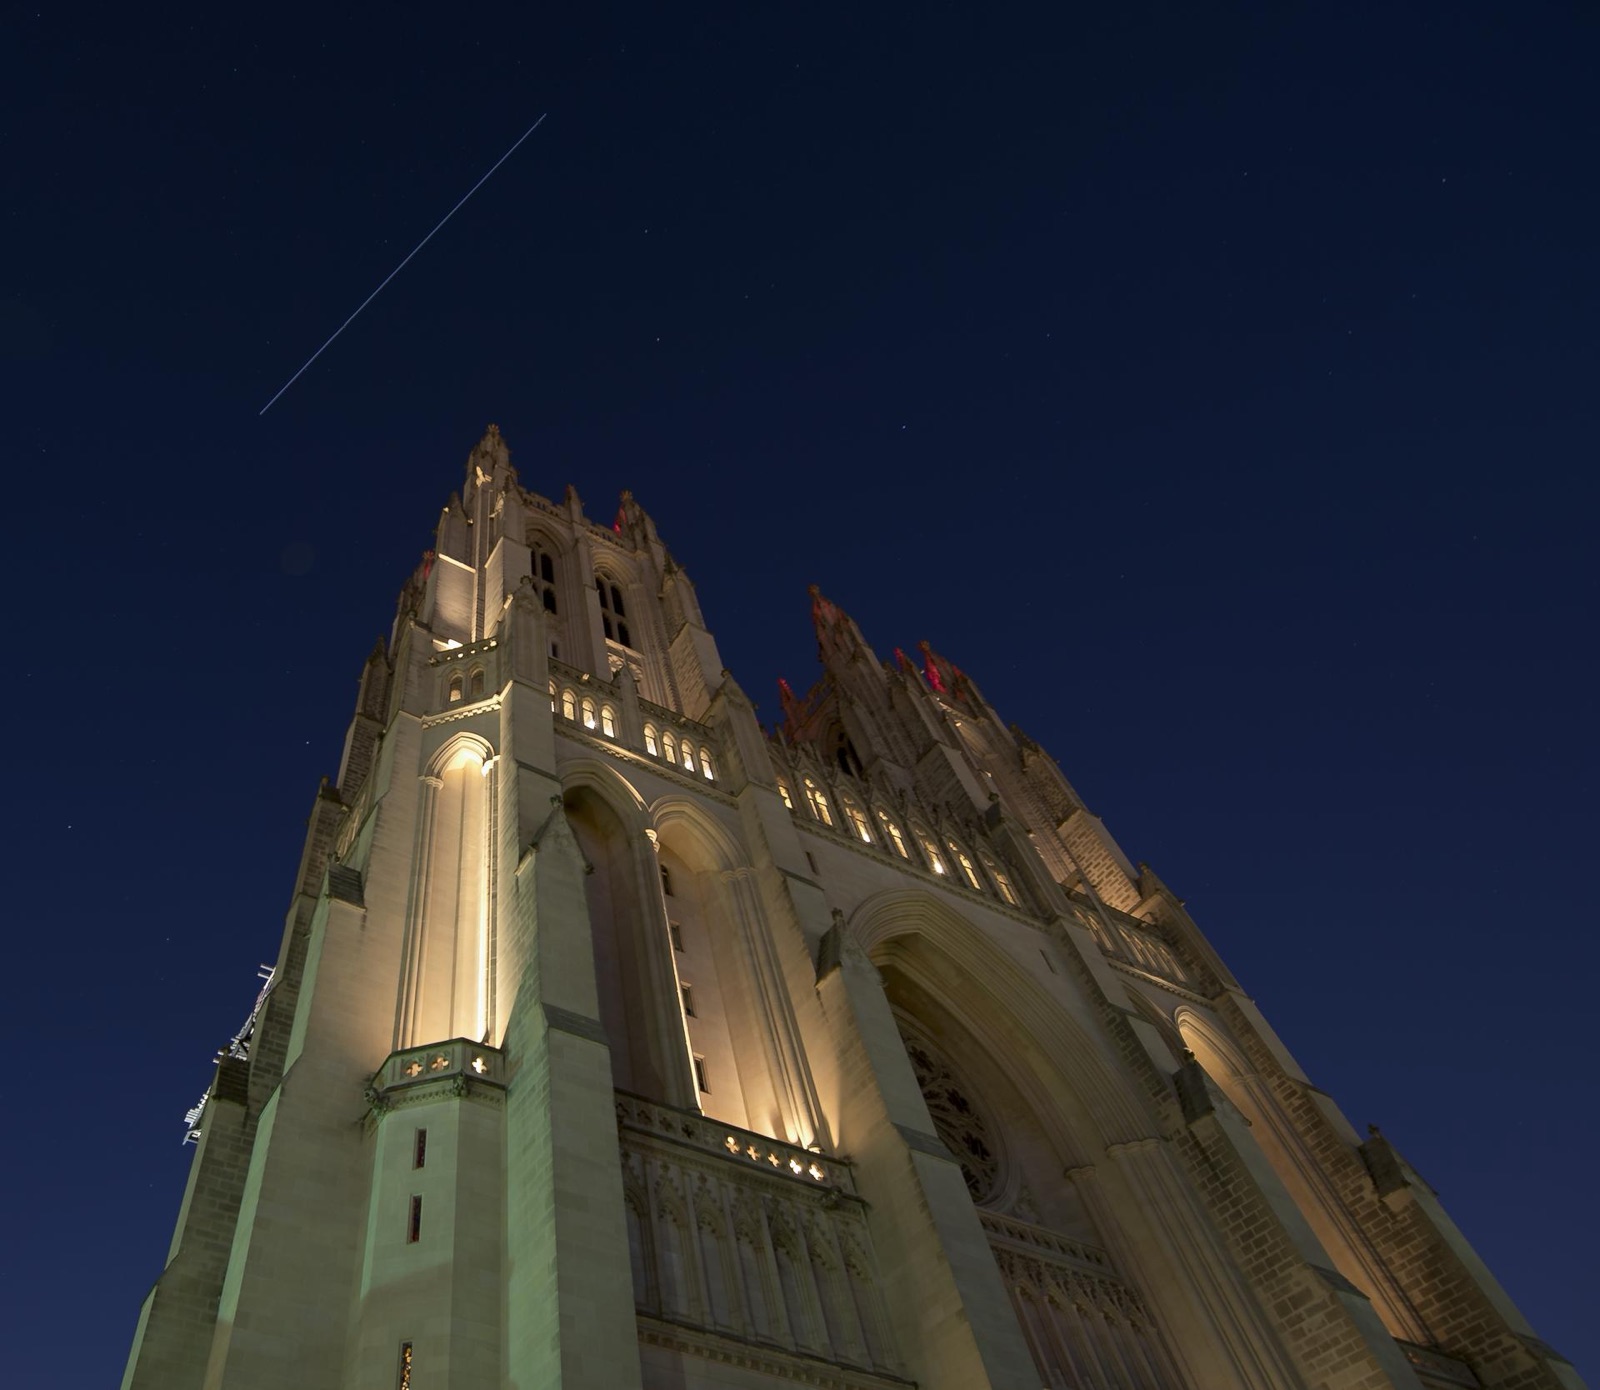
Stacking the trail
Load the frames into StarStaX, Sequator or Photoshop as layers and blend with Lighten. The segments join into one arc. The stars barely move in a few minutes, so they stay sharp. Use the gap-filling option if the one-second breaks bother you, or leave them in. A dashed trail is clearly a satellite. It's the same workflow as stacking star trails, but over minutes instead of hours.
Advanced: transits of the Sun and Moon
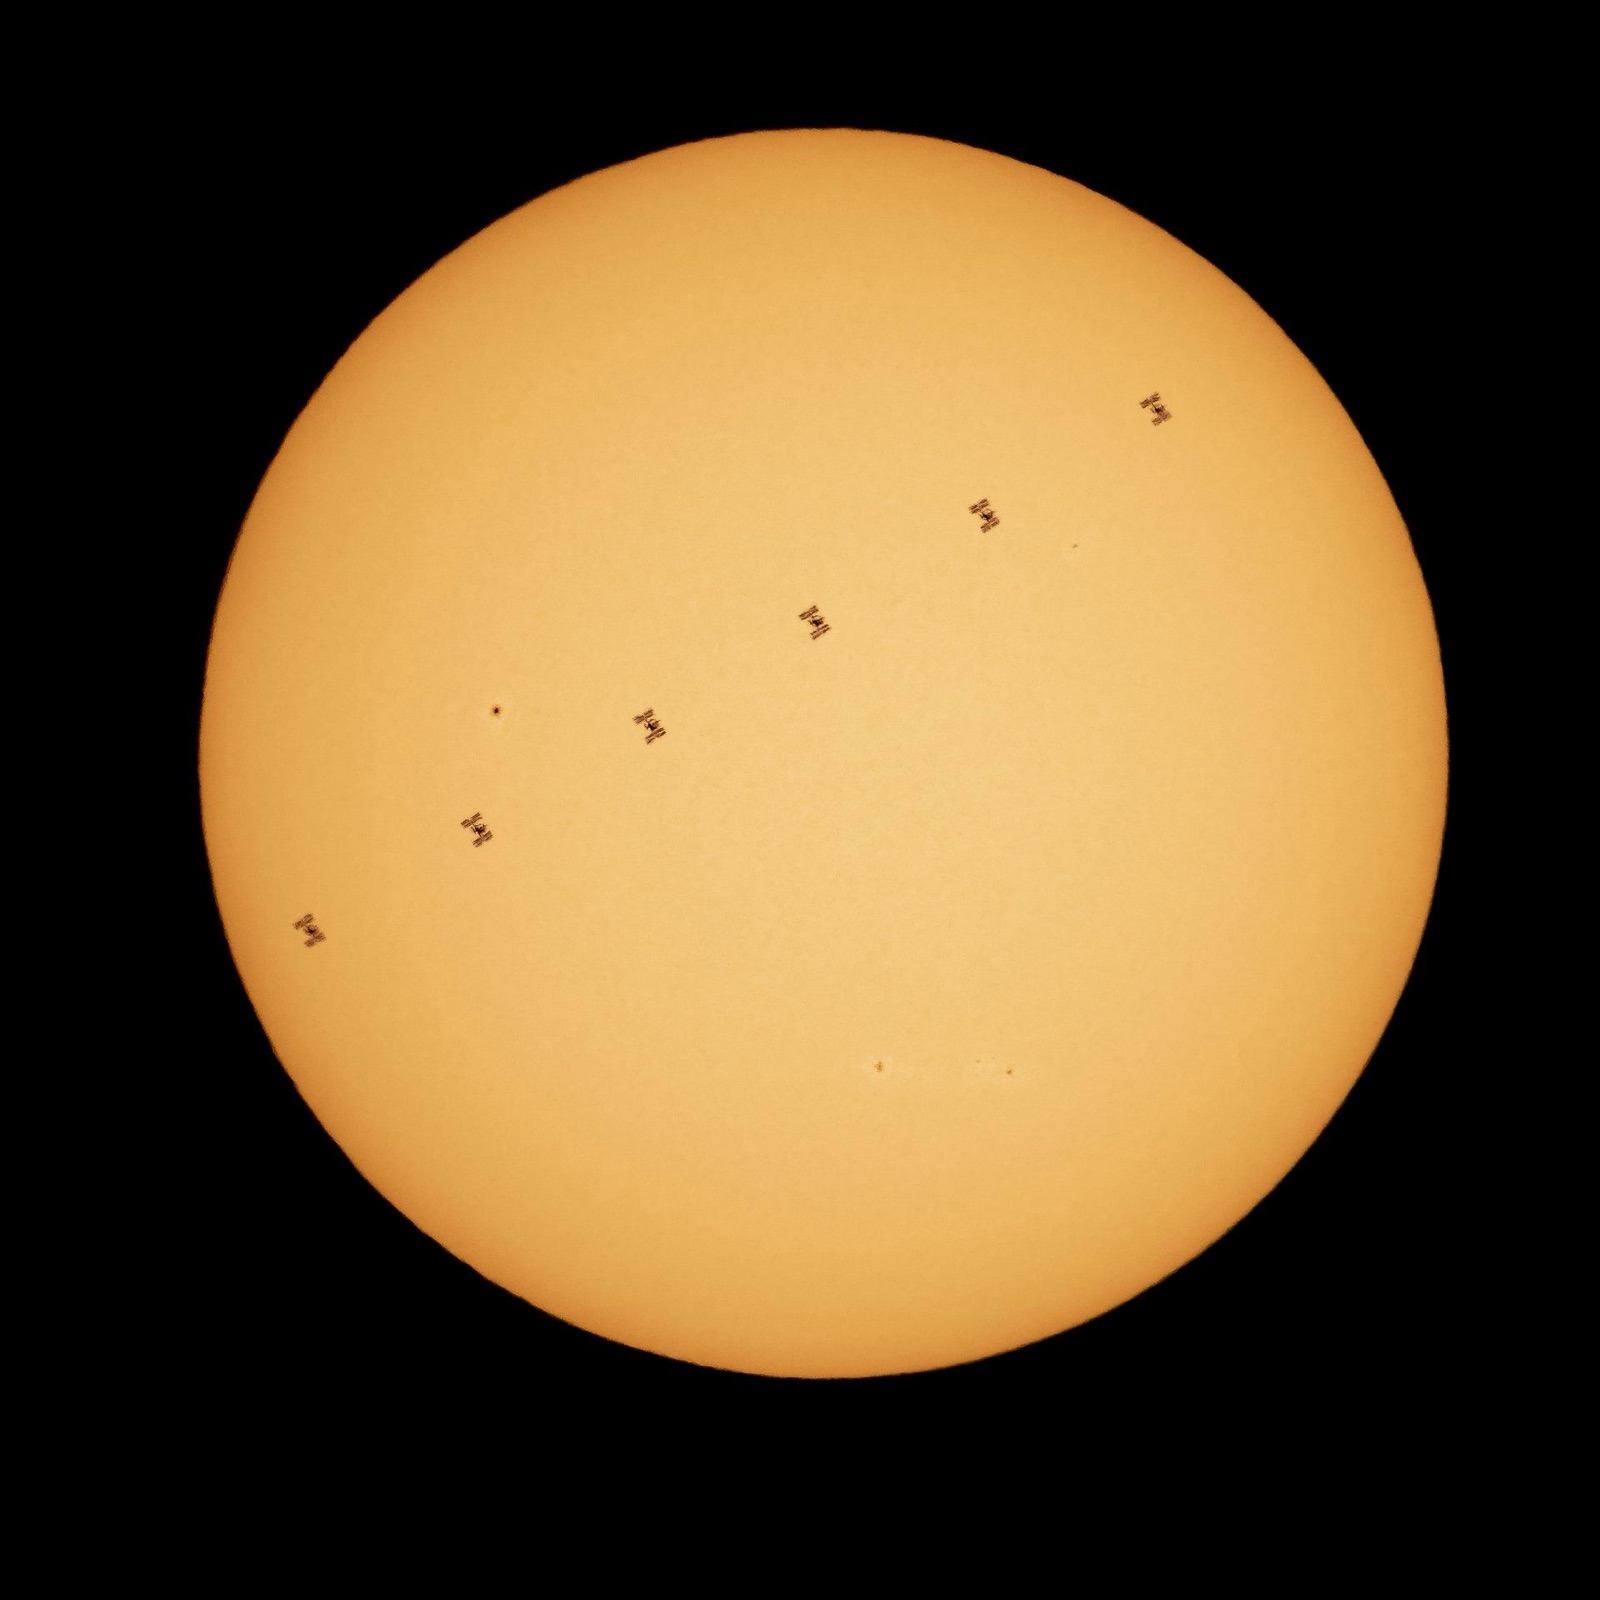
A few times a year the ISS crosses the face of the Sun or the Moon as seen from a strip of ground about 3–4 miles wide. The crossing takes under a second. You need a long lens (600 mm and up), a burst rate of 10+ frames per second, a shutter of 1/1000 s or faster, a precise position inside the strip and a clock synchronised to the second. For the Sun, a certified solar filter is mandatory. Tools like transit-finder.com compute the ground track, and the app's satellite data will show you the timing at your spot. It's fiddly, and you only get one attempt at each transit.
Starlink trains and other satellites
Newly launched Starlink satellites travel in a compact line, the "train", for their first days in orbit. That's when they're brightest, before they climb to their final altitude around 340 miles and spread out. Photograph a train like an ISS pass: f/2.8, 10–30 s, ISO 640–1000, wide lens, continuous. The app lists them under Satellites with a note that their brightness varies with orientation. Tiangong and Hubble follow the same rules as the ISS. Ordinary satellites are fainter, but there are dozens in any wide-field frame after dusk.
Common mistakes
- Framing where the ISS would set when it will fade into shadow halfway.
- Starting late. Begin the sequence before the predicted time.
- Autofocus, or focusing on nothing because the sky is empty.
- A single four-minute exposure that blows out the sky and the trail.
- Old orbit data. Open the app with a connection the day before.
FAQ
What camera settings should I use to photograph the ISS?
f/2.8, 10–13 seconds, ISO 800 from a dark site or 400 from a town, manual focus on a star, continuous shooting with a one-second gap. Stack the frames afterwards.
How do I know when the ISS will pass over me tonight?
Any pass predictor for your location will tell you. Still Dark lists them under Sky Events → Satellites with times, directions and brightness. NASA's Spot the Station and Heavens-Above are the classic web sources.
Why did the ISS disappear in the middle of the sky?
It entered Earth's shadow. The station shines by reflected sunlight. When it crosses into the night side it stops reflecting light and fades out in seconds. Predictions flag this as "fades into Earth's shadow."
Can you see the ISS with the naked eye?
Easily. On a good pass it's brighter than any star, a steady white point moving smoothly west to east. It never blinks. If the lights blink, it's an aircraft.
Sources and further reading
- NASA — Spot the Station (orbit facts: 28,000 km/h, ~400 km, 16 orbits a day, 51.6° inclination).
- PhotographingSpace — How to Find, Photograph, and Process an ISS Pass.
- Digital Camera World — How to photograph the International Space Station.
- Alex Conu, Nature TTL — ISS photography and transits.
- Space.com — How to photograph Starlink satellites.