Moon
How to Photograph the Moon With a Telephoto Lens: Sharp Craters, the Terminator and Mineral Colour
A full Moon through a 400 mm lens is a flat white disc. The same lens on a first-quarter Moon shows crater walls casting shadows tens of miles long, a mountain range lit by the sunrise and a 68-mile fault that shows as a single dark line. The lens is the same. What changes is the phase, the time of night, the air, and what you do with thirty frames afterwards. This guide covers how to photograph the Moon with a telephoto lens for detail. For the full Moon as a scene, see the supermoon guide. For placing it behind a landmark, see the Moon-behind-a-landmark guide.
At a glance
- Settings: manual, RAW, ISO 100–400, the lens's sharpest aperture (f/5.6–f/8 on most telephoto zooms, f/11 at most), shutter 1/250 s or faster at 400 mm, 1/500 s at 600 mm. Start from Looney 11 (f/11 at 1/ISO) and open up 1–2 stops for crescents and the terminator.
- When: first and last quarter and the days either side for shadows. Gibbous for Copernicus, Clavius and Tycho in relief. Full only for Tycho's rays and mineral colour.
- Where in the sky: above 30–40°, after the ground has cooled, never over rooftops. Above 600 mm the atmosphere limits sharpness more than the lens does.
- Afterwards: burst 20–50 frames or a minute of 4K video, stack the sharpest in AutoStakkert!, sharpen with wavelets in RegiStax, then curves and a crop.
Best Moon phase for craters: where the shadows are
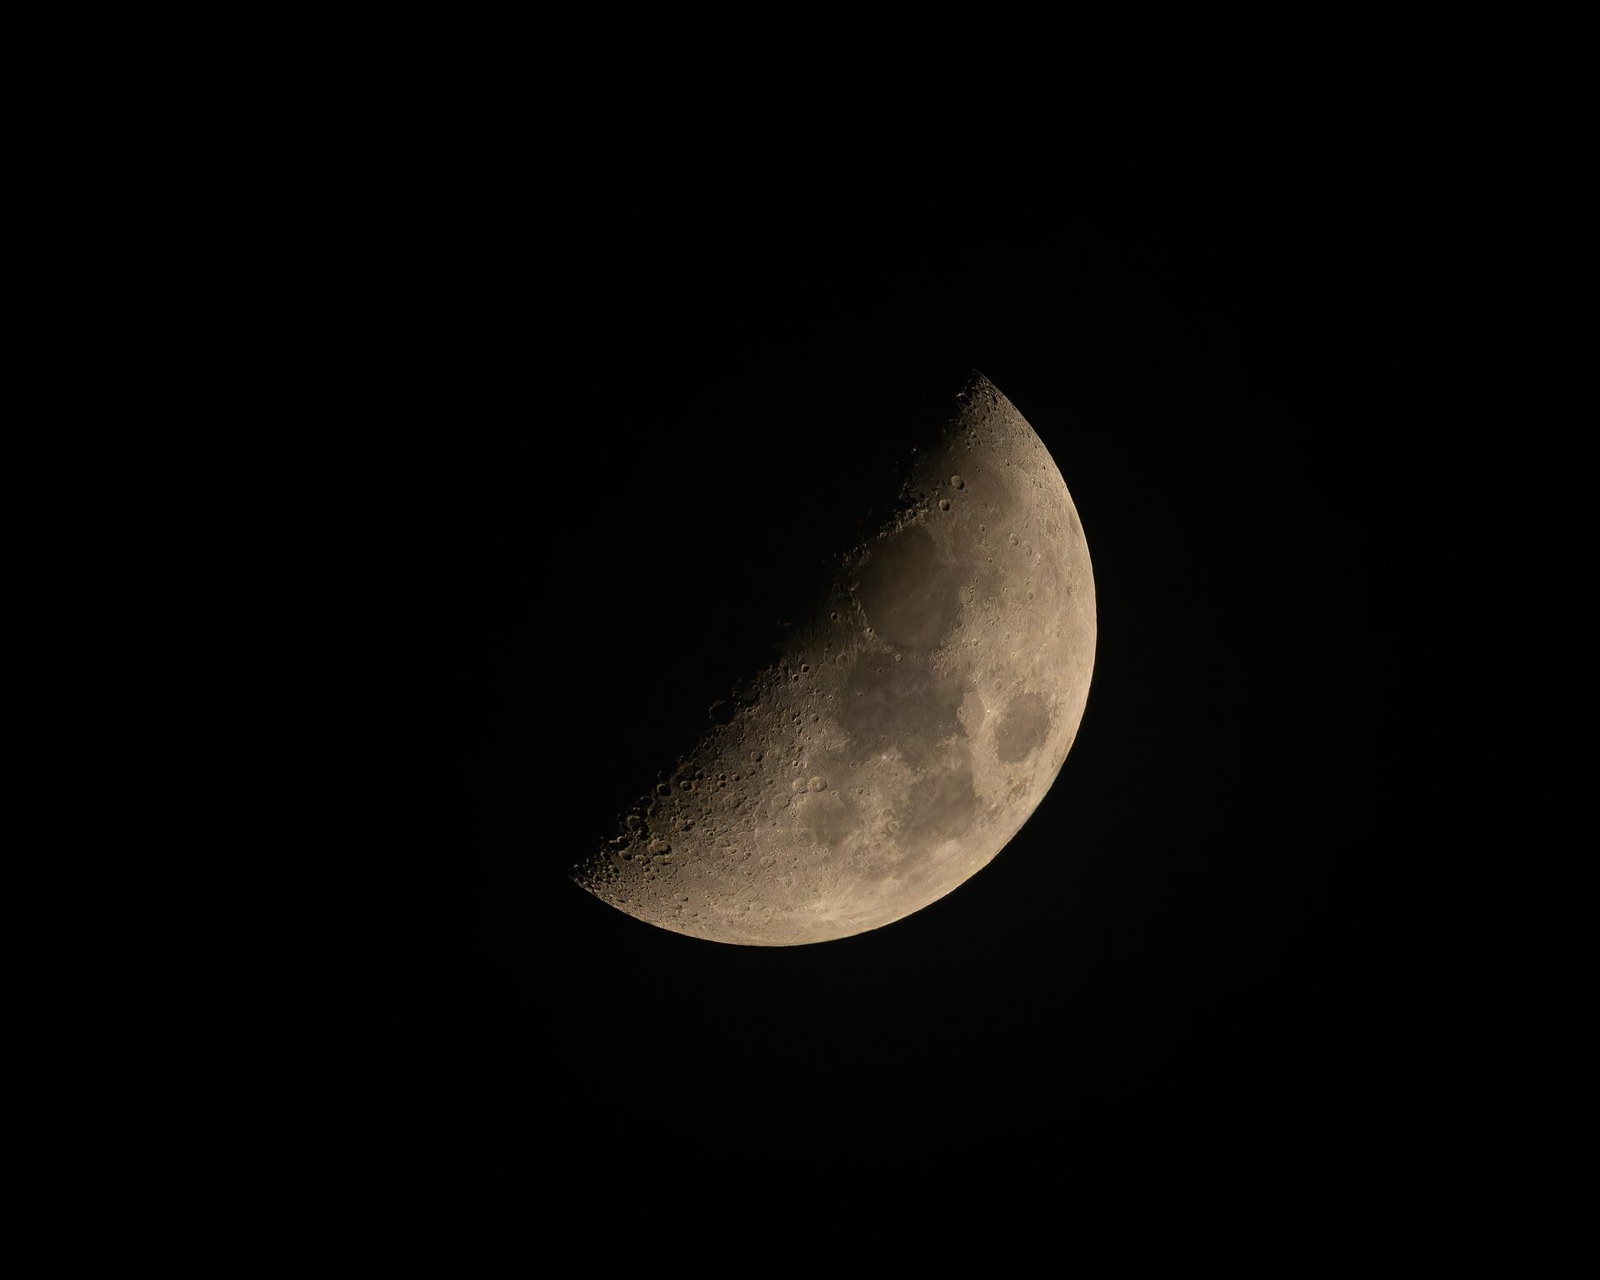
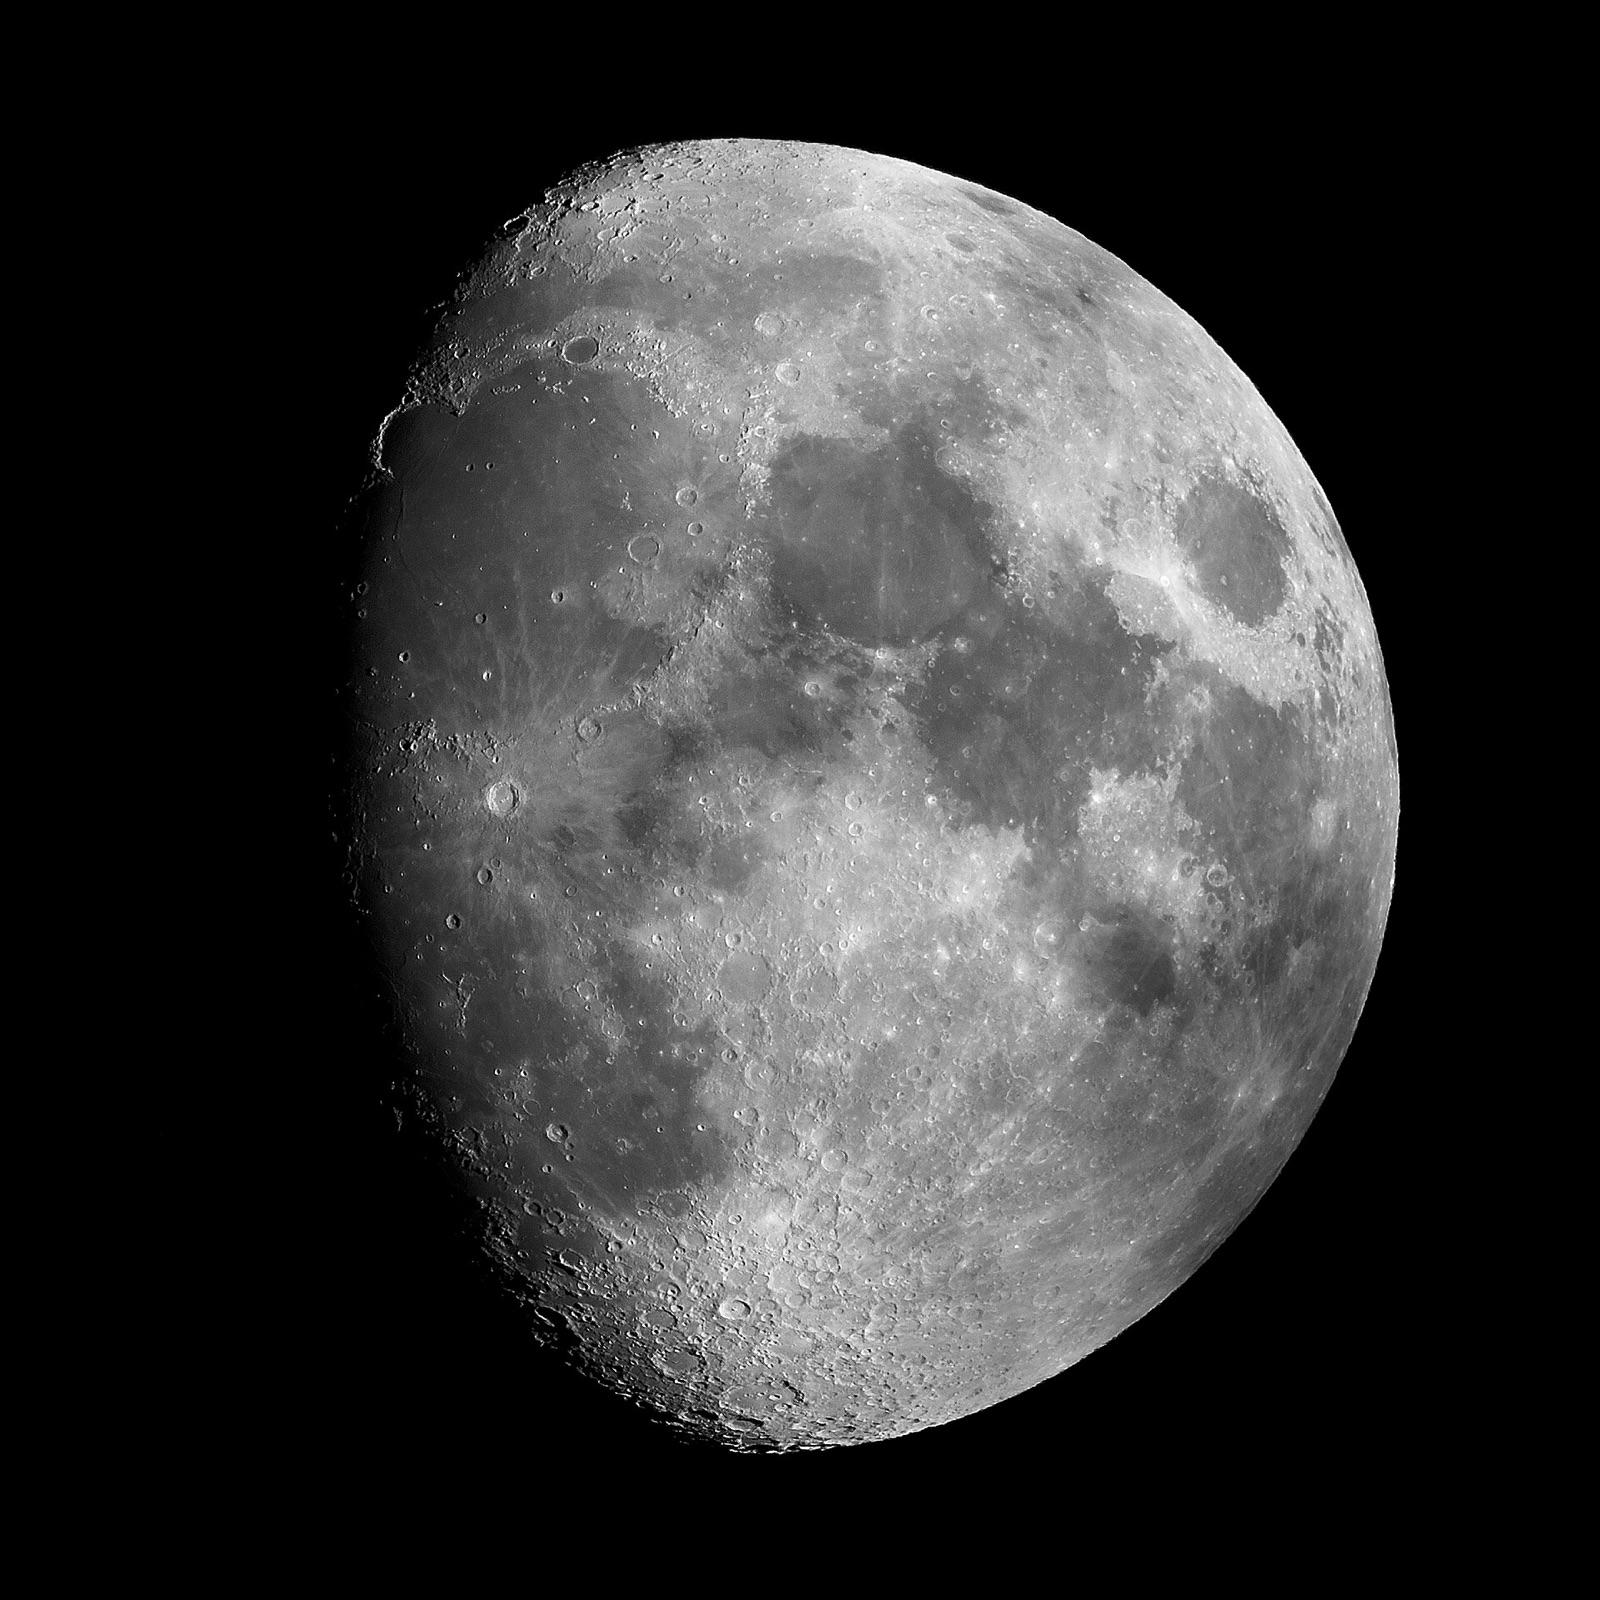
How much relief you see on the Moon depends on the Sun's angle. Along the terminator, the line between lunar day and night, light arrives at a low angle and every rim and peak casts a long shadow. A couple of hundred miles away the shadows are gone. At full Moon the Sun is overhead everywhere and all you see is albedo, meaning bright young ejecta and dark old lava. The terminator moves across the disc at about 12° of lunar longitude a day, so each night a new strip is in low light. The quarters are the best time because the terminator then runs down the middle of the disc, where you see features face-on. (Lunar "day" below means days since new Moon. First quarter is about day 7.4, full 14.8, last quarter 22.1.)

| Phase (lunar day) | Best along the terminator | Notes |
|---|---|---|
| Waxing crescent (3–5) | Mare Crisium, Petavius | Crisium (345 mi) sits near the north-eastern limb and its shape changes with libration. Petavius (110 mi) shows its central peaks and floor rille on day 3. By day 4 the shadows are mostly gone. Low in the west after sunset, so expect poor seeing. |
| First quarter (7–8) | Vallis Alpes (Alpine Valley), Ptolemaeus–Alphonsus–Arzachel, Rupes Recta (Straight Wall) | The Alpine Valley cuts 103 miles through the Montes Alpes. The three big craters form a chain at the centre of the disc. The Straight Wall, a 68-mile fault only 800–1,000 ft high, shows as a dark line for about a day after first quarter, when the low Sun puts its slope in shadow. |
| Waxing gibbous (9–12) | Copernicus, Clavius, Tycho, Sinus Iridum | Copernicus (58 mi, 2.4 mi deep) shows terraced walls and central peaks around day 9. Clavius (144 mi) is a notch in the terminator one to two days after first quarter. Tycho's rim and peak stand out on day 9–10. On day 10–11 the Montes Jura are in sunlight while Sinus Iridum is still dark. This is the "Golden Handle", a bright arc sticking out from the terminator. |
| Full (14–15) | Tycho's rays, Aristarchus | No shadows. Tycho's rays reach 930 miles and are easiest to see with the Sun overhead. Aristarchus (25 mi) is the brightest large feature on the Moon, with nearly twice the albedo of its surroundings. This is the best night for mineral colour. |
| Waning gibbous (17–20) | Crisium and Petavius again, lit from the other side | The Moon rises late. Shoot after midnight when it is high. |
| Last quarter and after (22–26) | Ptolemaeus chain again, then Mare Humorum, Gassendi, Schickard | Two to four days after last quarter the terminator reaches the western maria: Gassendi (69 mi, rille-cracked floor) on the north rim of Mare Humorum, then Schickard (132 mi) near the south-western limb. Pre-dawn targets, often in the steadiest air of the night. |
Moon Details in Still Dark gives the phase, age in days, percentage illuminated and the current libration, the few degrees of tilt that decide whether Mare Crisium and the other limb features are turned toward you or foreshortened against the edge. The Sun & Moon card lists moonrise, transit and set, and in the 360° sky you can drag time through the night to find the hours when the Moon is above 30°. The Moon Atlas card labels named craters, maria and mountain ranges on a 3D globe.
Moon photography settings: start from a daylight exposure
The lunar surface is lit by the same Sun as a daytime landscape, so it needs a daytime exposure. The baseline is the Looney 11 rule: f/11 and a shutter of 1/ISO, so ISO 100 at 1/125 s, ISO 200 at 1/250 s, ISO 400 at 1/500 s. It's Sunny 16 opened one stop, because the Moon's grey surface reflects less than an average scene. That's for a full or gibbous Moon well up in a clear sky. Then adjust:
- Gibbous: the disc is bright, and you often need about half a stop less.
- Quarter: about one stop more. The terminator is lit at a grazing angle and is far darker than the disc average.
- Crescent: one to two stops more. Expose for the sunlit strip, not the frame.
- Low Moon: two to four stops more under 15° altitude. The air that turns it orange also dims it.
Use manual exposure or spot-meter the sunlit surface. Matrix and centre-weighted metering read a black frame with a small bright disc and overexpose the disc. Shoot RAW, bracket ±1 stop, and keep the brightest highlands just short of clipping.
- Aperture: the lens's sharpest stop. For a 100–400 mm or 150–600 mm zoom that's usually f/5.6–f/8, a stop down from wide open. Don't go past f/11, because diffraction starts to blur fine crater detail. Depth of field doesn't matter at 236,000 miles.
- Shutter: 1/250 s or faster at 400 mm, 1/500 s at 600 mm and up. The atmosphere shimmers at tens of hertz, and 1/60 s blurs that together even on a tripod. There's plenty of light, so use a fast shutter.
- ISO 100–400. Base ISO gives the cleanest file for the heavy sharpening later. Raise it only if you need to keep the shutter fast.
Is 400 mm enough? Focal length and Moon size
The Moon spans about half a degree, which puts a disc of roughly focal length ÷ 109 on the sensor. That's 3.7 mm at 400 mm and 5.5 mm at 600 mm. On a full-frame sensor 24 mm tall, 400 mm gives a Moon about 15 % of the frame height. A crop sensor doesn't enlarge the image. It crops it. But its pixels are smaller, so more of them cover the disc, and the number of pixels across the disc is what matters.

| Focal length | Moon on sensor | Share of full-frame height | Pixels across, 24 MP full frame (≈ 6.0 µm) | 45 MP full frame (≈ 4.35 µm) | 24 MP APS-C (≈ 3.9 µm) |
|---|---|---|---|---|---|
| 200 mm | 1.8 mm | 8 % | ≈ 300 | ≈ 420 | ≈ 470 |
| 300 mm | 2.8 mm | 11 % | ≈ 460 | ≈ 630 | ≈ 700 |
| 400 mm | 3.7 mm | 15 % | ≈ 610 | ≈ 840 | ≈ 940 |
| 600 mm | 5.5 mm | 23 % | ≈ 920 | ≈ 1,270 | ≈ 1,410 |
| 800 mm | 7.3 mm | 31 % | ≈ 1,220 | ≈ 1,690 | ≈ 1,880 |
| 1,200 mm | 11.0 mm | 46 % | ≈ 1,830 | ≈ 2,530 | ≈ 2,820 |
A 600 mm lens on APS-C frames like 900 mm on full frame. At around 1,400 pixels across the disc, craters of 6–9 miles show structure and you can resolve the Alpine Valley's 6-mile width. You can't resolve its central rille, which is a third of a mile wide and hard to see even in a telescope.
Teleconverters. A 1.4× costs one stop of light and a little sharpness. A 2× costs two stops and halves the lens's resolving power, so it often adds pixels without adding detail. For the Moon the lost light hardly matters (Looney 11 at f/16 and ISO 400 is still 1/250 s), so a good 1.4× on a sharp lens is worth using. A 2× on a consumer zoom usually isn't, because cropping gives you the same detail. If you're asking how to photograph the Moon with a telephoto lens you already own, use it as it is and crop afterwards.
How to photograph the Moon with a telephoto lens: tripod and focus
- Stop shutter shock: use electronic shutter, electronic first-curtain, or mirror lock-up on a DSLR. Mirror slap at 600 mm causes visible blur.
- Never touch the camera during the exposure. Use a 2-second timer, a cable release or the phone app.
- Turn stabilisation off, or check the manual. On a locked-down tripod some stabilisers hunt for motion that isn't there and add blur. Canon has advised switching IS off on a tripod since its first stabilised lens, though newer lenses detect the tripod themselves. On a monopod, leave it on.
- Support the lens, not the body, on its tripod collar. For a 150–600 mm a gimbal head makes it easy to follow the Moon. A ball head sags when you let go, which shifts the framing.
- Focus manually at 10× in live view on the terminator, where contrast is highest, or on the limb at full Moon. Autofocus will lock, but not accurately enough for crater work. Refocus every twenty or thirty minutes as the Moon climbs and the lens cools. There's more on this in the night-focus guide.
Seeing, and stacking a burst (lucky imaging)
Beyond about 600 mm the atmosphere limits how sharp a Moon photograph is, more than the lens does. Turbulent air blurs the image by one to several arcseconds. A 600 mm lens on a 24 MP full-frame sensor samples at about 2″ per pixel and 1,200 mm at 1″, so on a poor night a longer lens shows no more detail. Three things help a lot:
- Shoot the Moon high. Above 30°, better 40°+, you look through half the air you would at 15°. A first-quarter Moon is highest in the early evening, and a last-quarter Moon around dawn.
- Wait for the ground to cool. Tarmac, roofs and walls give off heat for an hour or two after sunset, and that makes the image shimmer.
- Don't shoot over rooftops. Warm air from a heated house under the Moon's path blurs the frame.
Watch live view at 10×. On a bad night the limb keeps rippling, and on a good one it stays still for seconds at a time. A burst catches those still moments and stacking software keeps only those frames. It's the same method as in the planets guide, used on a bigger and much brighter target:
- Capture 20–50 RAW frames in a burst at 1/500 s or faster, or 30–60 s of 4K video at the highest bit rate.
- Pre-process in PIPP if you like. It centres and crops each frame and discards the worst. It's no longer maintained, but the last version is freely mirrored and still widely used.
- Stack in AutoStakkert!, which grades every frame, aligns on a grid of points across the disc and averages the best 10–50 %. Use fewer in poor seeing and more in good.
- Sharpen with wavelets in RegiStax or AstroSurface, which sharpen fine detail without inflating noise the way a single unsharp mask does.
- Curves, then a gentle crop in your RAW editor, with the disc off-centre if the terminator is the subject.
A stack of thirty frames is visibly sharper than the best single one. Averaging also reduces noise, so you can sharpen a stack much harder. On a stack you can see the terraces in the shadows inside Copernicus, and on a single frame they're a smudge. The process is slow the first time and much quicker by the third.
The mineral Moon
The Moon isn't grey. Its colours are faint, a few percent of saturation, but they're real, and they come from the chemistry of the surface. Lunar colour depends mainly on iron and titanium. Titanium-rich basalt, such as the lava of Mare Tranquillitatis, reflects slightly bluer, while basalt with less titanium looks orange-brown and the highlands stay pale. NASA's orbital colour maps use these differences to map titanium, and Tranquillitatis shows as a deep blue patch beside the browner Mare Serenitatis.
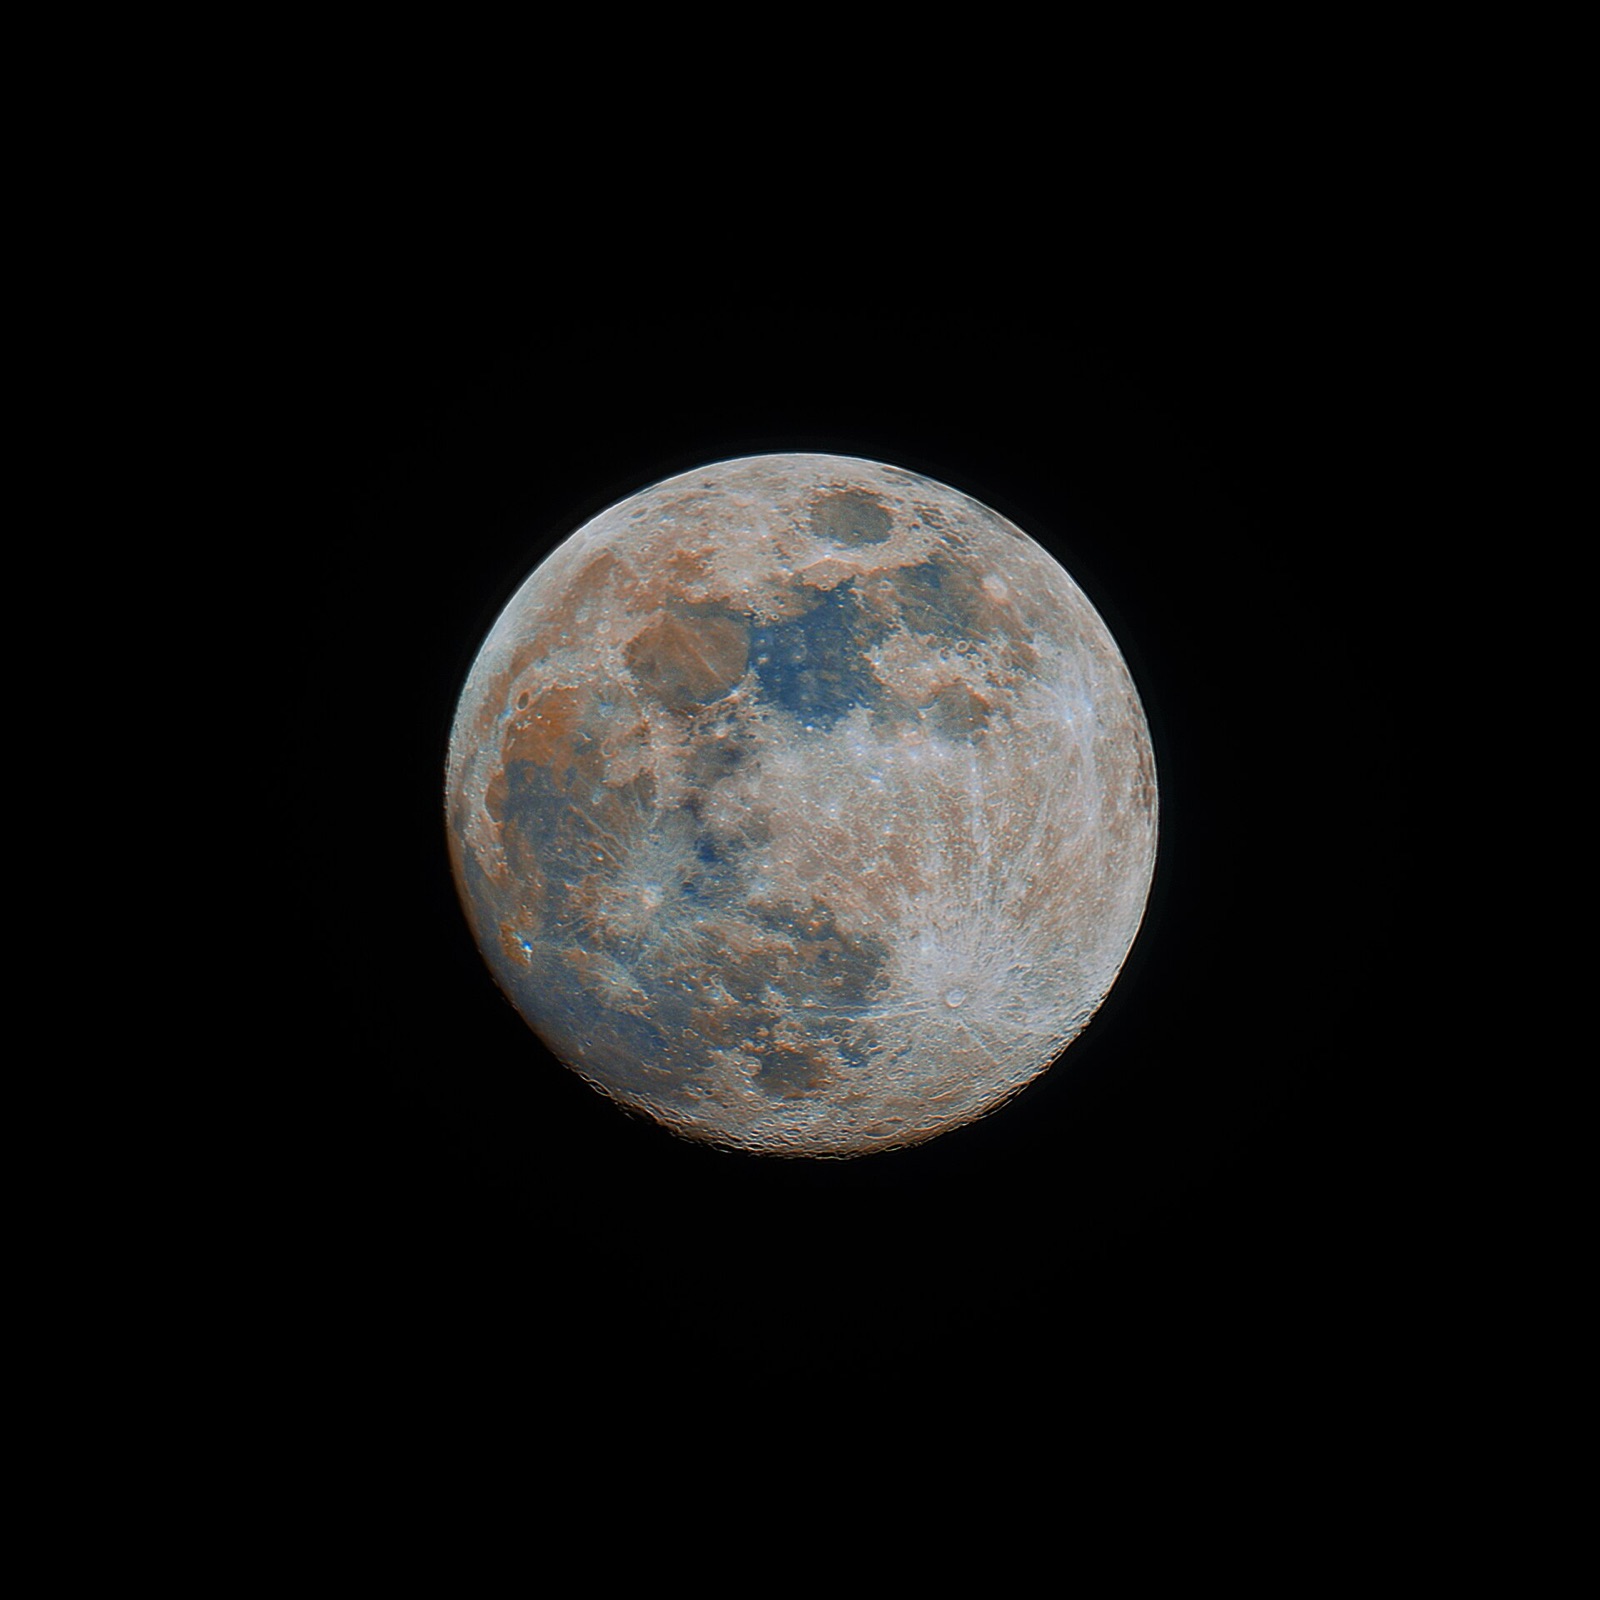

To bring the colour out, stack a full or gibbous Moon as above, work on the RAW data, set a custom white balance on the disc so the highlands are neutral, then raise saturation a lot, often 200–300 % in two or three steps with a little noise reduction between. The white-balance step matters because any cast from the atmosphere or the sensor gets amplified along with the real colour. Stop before the colours look fake. It's easy to go too far.
Camera Tools in Still Dark has an exposure recipe for the Moon and a field-of-view calculator for your focal length and sensor. Compare the frame with the Moon's angular size on the Sun & Moon card, which changes with distance from about 29.3′ at apogee to 34.1′ at perigee.
Variations: daylight, motion, Earthshine, a phone
The daytime Moon. A first-quarter Moon is up all afternoon, a last-quarter Moon all morning (Moon phases for photographers has the full timetable). Against blue sky the disc has less contrast and no halo, and the air is often steadier than in the first hours of darkness. Exposure is the same Looney 11 baseline. A polarising filter darkens the sky most at 90° from the Sun, which is where a quarter Moon is. It costs one to two stops, and the Moon is bright enough that you can spare them.
The Moon moves. Against the stars it drifts east by about its own diameter, half a degree, every hour, on top of the sky's 15°/h rotation. In a 1/500 s frame this doesn't matter. Over a minute of video at 1,000 mm and above, the disc drifts across the frame and the stack loses its edges. A tracking mount at lunar rate keeps it centred. Otherwise, recentre between bursts.
Earthshine. On a crescent the dark part of the disc glows with sunlight reflected off Earth. It needs an exposure hundreds of times longer than the crescent, roughly 1–4 s at f/5.6, ISO 800, which overexposes the crescent. Take both and blend, or bracket and merge. The same two-exposure approach works for a Moon–planet pairing, which is covered in the conjunction guide.
A phone through binoculars or a telescope. A phone clamped to the eyepiece of a spotting scope, a telescope or one side of a pair of binoculars photographs the terminator well. Centre the Moon, drag the exposure down until the highlands stop clipping, lock focus, record 4K video for 30–60 s and put the clip through the same stacking software. A stacked phone clip through an 8″ telescope beats a single camera frame through any lens. More on the phone side in iPhone astrophotography.
Common mistakes
- Shooting only the full Moon. With no shadows there's no relief. The craters show best around the quarters and on gibbous nights.
- Centre-weighted or matrix metering that averages a black sky and blows the disc to white.
- 1/60 s at 600 mm. The Moon is bright, so you don't need a slow shutter, and a slow one blurs the detail.
- A Moon at 10° altitude through hot evening air over houses. Wait two hours, or shoot the next morning.
- JPEG. Stacking, wavelets and the mineral saturation all need RAW headroom.
- Over-sharpening. A white rim on the limb and gritty maria mean you've pushed the wavelets too far.
FAQ
What settings should I use to photograph the Moon with a telephoto lens?
Manual, RAW, ISO 100–400, the lens's sharpest aperture (usually f/5.6–f/8, never past f/11) and a shutter of 1/250–1/1000 s. Start at Looney 11 (f/11, 1/ISO) and open up one stop for a quarter Moon, two for a crescent. Shoot a burst and stack.
Which Moon phase is best for craters?
First and last quarter and the days around them. The terminator then runs down the middle of the disc and everything along it has long shadows. Gibbous nights show Copernicus, Clavius and Tycho in relief, and the full Moon shows Tycho's rays and colour but no shadows.
Is 400mm enough to photograph the Moon?
Yes, for the disc with the maria and the largest craters. You get about 600 pixels across on a 24 MP full-frame sensor, and more on a crop body. To see structure inside craters you need 600 mm and up, and above that the atmosphere limits the detail more than the lens does.
Why are my Moon photos blurry even on a tripod?
The cause is usually seeing, shutter speed or focus, in that order. Shoot when the Moon is above 30° and the ground has cooled, keep the shutter at 1/500 s or faster, focus manually at 10× on the terminator, and stack a burst so you keep the sharpest frames.
Are the colours in a "mineral Moon" photo real?
Yes, but exaggerated. The surface has faint colour differences set by iron and titanium content (titanium-rich basalt in Mare Tranquillitatis is slightly blue, lower-titanium basalt orange-brown) and the technique multiplies that saturation many times over. NASA orbital imagery uses the same contrasts to map composition.
Sources and further reading
- Wikipedia — Looney 11 rule (f/11 at 1/ISO; one stop more than Sunny 16 because of the Moon's low reflectivity).
- Wikipedia — Rupes Recta and Sinus Iridum (the Straight Wall's dimensions and day-8 shadow; the Golden Handle 10–11 days after new Moon).
- Society for Popular Astronomy — Getting to know the Moon (features by phase: Crisium and Petavius on the crescent, Alpine Valley and Ptolemaeus at first quarter, Copernicus, Tycho, Clavius, Gassendi and Sinus Iridum on the gibbous Moon).
- LROC, Arizona State University — Color of the Moon (lunar colour controlled by iron and titanium; TiO₂ shifts mare colour from red to blue; Tranquillitatis versus Serenitatis).
- Wikipedia — Teleconverter (a 2× reduces light to a quarter — two stops — and halves the resolution of the master lens).
- AutoStakkert! — Lucky imaging stacking software (the stacking step; RegiStax and AstroSurface for wavelets).